 |
|
|
|
|
|
|
Home |
Meaning of Life |
There a God? |
of Christ |
Catholic Faith |
|
|
|
|
|
|
|
Home |
Meaning of Life |
There a God? |
of Christ |
Catholic Faith |
|
|
 |
 |
||||||
|
With our Versatile Control Panel! The Amazing Control Panel at Siterightnow greatly simplifies table building, so that even a person with no experience can build beautiful, complex pages. We start with four examples that you can copy "as is" and use immediately (filling with your own text and pictures) in your own site.
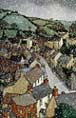
 1. First let's look at what you can do with just the simplest Table, with just one row of one "data cell." That's it, over there on the right. This table--or box--can have a border, it can be any size, you can place it anywhere on your page, it can have any color background, and you can add graphics and photos and text to fill it just like you do now on the entire page, article by article. 1. First let's look at what you can do with just the simplest Table, with just one row of one "data cell." That's it, over there on the right. This table--or box--can have a border, it can be any size, you can place it anywhere on your page, it can have any color background, and you can add graphics and photos and text to fill it just like you do now on the entire page, article by article. To make this, we add one blank article just before the place we want the table to start, and into this article we copy and paste the following: [table border="1" bordercolor="midnightblue" cellpadding="9" align="right" bgcolor="aliceblue"][tr][td] [We offer explanations of what these odd looking commands, or "tags" do as we go along, but to use the exact same tables in your website, with your own different content of course, you do not need to make any changes.] This gives us a border 1 pixel wide (one border for each of the main table and the one data cell in it), we color the border midnight blue, we allow "breathing room" around the inside of 9 pixels (or 1/8 inch), we place (align) the table on the right side of our page, and we color the background Alice Blue. Any or all of these things can be changed, simply by overwriting a different value into each part of the tag. This will become more clear as we go through all four examples. Note that this table will be any overall size at all, depending on what you want to fill it with. No matter what you put in, it will leave just enough room plus 1/8 inch to the edge. If you wanted JUST this size table, no matter what is in it, you would have to specify the height and width yourself. We always specify in pixels to a computer, there being 72 pixels per inch. In this case (what you see as our example) you would add height="160 width="360" anywhere inside the table tag, so that the line you would copy becomes [table border="1" height="160" width="360" bordercolor="midnightblue" cellpadding="9" align="right" bgcolor="aliceblue"][tr][td] COLORS: There are 216 colors we can use. A nice chart with the names of all can be found at HTML Colors. Substitute freely in the tags that you copy. Now the fun part. We just go on to the NEXT Article on the Control Panel and fill in our table just like we would make a normal page. To make this example, we put in a picture (small, remember) and marked it to go on the Left. We left "more space" around it of 8 pixels, so our pic is now 8 + 9 = 17 pixels from the border. We wrote our text, just the way we want it to appear. All of the formatting of regular Articles applies. If we want more space at the top or bottom or in between lines, we just hit Enter, as usual. Then, where we want the table to end, we copy and paste in this: [/td][/tr][/table] This closes the one data cell, closes the one row, and closes the table. End of Table. The link on it is non-working, because we don't want you to wander off to another site. Then you can go on with your page, either in the same Article or in a new one if you need to have a new picture. Notice that the text wraps around the table automatically. When we got to the end of this particular table, we started a new Article and specified a picture of a little orange rose, above, to be put on the left.  2. Next let's look at what you can do with a Table with just one row of three "data cells." We will change much of the mat color from white to eye-saving yellow, and we will make the lines of print shorter and easier to read. 2. Next let's look at what you can do with a Table with just one row of three "data cells." We will change much of the mat color from white to eye-saving yellow, and we will make the lines of print shorter and easier to read.To see an example, go to [link to Siterightnow page, similar to one at www.meaning-of-life.info/tables1.html ] To do this, we will leave the first and last cell empty, to provide extra room around our text and pictures on the page, which all go into the middle cell. This table can have a border, but we will specify no border on ours. It can have any color background, and you can add graphics and photos and text to fill it up just like you do now on the entire page, article by article. The text can be any width. Our example uses 100% (8 inches) of a whole page width for the yellow table, but only 70% of the table is used for the text, to mimic the pages of the original book the story came from. We use 15% each for the right and left margins. To make this, we create a separate empty Article where we want the page to start (here of course at the very beginning, Article 1) and into this article we copy and paste the following: [table border="0" width="100%" bgcolor="ivory"][tr][td width="15%">[/td] [td width="70%"] After this, starting with the NEXT Article in the Control Panel, we can fill in with as many normal Articles, with pictures, as we like. They will all be inside our ivory colored table with no borders (we made border = 0). Then, where we want the table to end, we cut and paste in this: [/td][td width="15%"] [/td] [/tr][/table]. That's it. Siterightnow does all the hard work for you, with Articles. Try it with one of your pages. (Make a copy of the page first to actually try this on, not the real page. To do this, click the "Add Page" link at the bottom of the control panel, and fill in the required information. ) If you just want a more narrow field of type for your document, without a colored background at all, just delete the bgcolor="ivory" in this table. Note that the first and third [td] cells are 15% of the width of the page each. This, together with the 70% in the middle cell where our stuff is going, must total to 100%. You can change the numbers to whatever you wish. A narrower strip of text might be 20% for each margin, and 60% in the middle.
4. A table that could be used as a Table of Contents.
[table border="0" cellpadding="6" cellspacing="20" align="left"] [tr][td width="140" bgcolor="mistyrose"] Fill with text and pictures starting in the NEXT Article, and at the end of your text you will copy the old familiar: [/td][/tr][/table] Here we did a few things differently. Instead of letting the table decide on the width, based on what we wanted in it, like we did in the first example, or instead of specifying a percentage of the page width, as in the last example, we specified width in terms of actual pixels, 140 of them, there being 72 pixels per inch. The table will then be that wide, even if empty. We also put the width and color specs in the td tag, instead of the table tag. We can do this because there is just one cell. Because the table has no border, we can use cellspacing="20" to keep the text that you are reading now 20 pixels away from the table. We also want a 6 pixel amount of breathing room inside the table (cellpadding) and we place the table (align it) all the way on the left. When we filled in our text, we used mostly size 1 type, the smallest available. Use the Text Enhancer to size small type like this. Our little rose pic we "Centered above the headline." To leave space at the top, we used Enter three times, although we could have put in a Break tag, [br], three times also. A FEW TIPS: If you do not want the look of the white overlay mat on a background, like we have here, all of these tables work just the same on any of the background combinations available from the Control Panel. But the overall width of 580 pixels (8 inches) that you have available to you as workspace width does not change. To make a background visible everywhere except under your tables, check the "Do not use white overlay" box in the Fonts link. To make your tables show the main backgound through them (like they are transparent) and not have their own background, just leave out the bgcolor tag. Delete it, including its quotation marks. All that will remain is the border, if any, and what was inside. But everything will still be in the same place on the page. You do not ever have to specify the height of a table. It knows. But if you want to, add height="xx" in pixels. In a table with no specified width, like our first example, you have to be careful to hit Enter where you want your line to stop, or your table will just keep getting wider. You will often do this in narrow tables, too, just to make sure it breaks the line where you want it to. Remember that as the working area of the page gets narrower, your pictures will still have to fit, so you may have to resize them narrower and smaller. To leave more room at the top of your headline, insert a [BR] tag in front of it. For text, you can also use use the Enter key repeatedly--it will automatically put in break tags. Check all "Don't Put a Divider line" boxes for the articles containing your tables! Remember that all colors and their names can be found at HTML Colors. Feel free to copy our little rose photos (or anything else). To copy any picture on the web to your own computer, right click on it and then click "Save Picture As..." Good luck! | Don Camillo | Siterightnow Page | | Return Home | The Meaning of Life | Is There a God? | Prayer | Teachings of Christ | Our Catholic Faith | Music | |
|||||||
 |
 |

 Ill give you some advice, but youre not going to like it. Leave your job until your child, and all your children, are in school.